视频分类
视频分类是指为整个视频分配一个标签或类别。每个视频通常只属于一个类别。视频分类模型接收视频作为输入,并返回该视频所属类别的预测结果。这些模型可以用于对视频内容进行分类。视频分类的一个实际应用是动作/活动识别,这在健身应用程序中非常有用。对于视障人士,尤其是在出行时,视频分类也是很有帮助的。
本指南将向你展示如何:
- 在 UCF101 数据集的子集上微调 VideoMAE。
- 使用微调后的模型进行推理。
要查看与本任务兼容的所有架构和检查点,我们推荐查看 任务页面。
在开始之前,请确保你已经安装了所有必要的库:
pip install -q pytorchvideo transformers evaluate
你将使用 PyTorchVideo(简称 pytorchvideo)来处理和准备视频。
我们建议你登录到你的 Hugging Face 账户,以便可以上传和分享你的模型。当提示输入令牌时,请输入你的令牌以登录:
from huggingface_hub import notebook_login

notebook_login()
加载 UCF101 数据集
首先加载 UCF-101 数据集的子集。这将让你有机会进行实验并确保一切正常运行,然后再花费更多时间在完整数据集上训练。
from huggingface_hub import hf_hub_download

hf_dataset_identifier = "sayakpaul/ucf101-subset"
filename = "UCF101_subset.tar.gz"
file_path = hf_hub_download(repo_id=hf_dataset_identifier, filename=filename, repo_type="dataset")
下载子集后,需要解压压缩包:
import tarfile

with tarfile.open(file_path) as t:
    t.extractall(".")
数据集的组织结构如下:
然后你可以统计总视频数量:
import pathlib

dataset_root_path = "UCF101_subset"
dataset_root_path = pathlib.Path(dataset_root_path)

video_count_train = len(list(dataset_root_path.glob("train/*/ *.avi")))
video_count_val = len(list(dataset_root_path.glob("val/*/ *.avi")))
video_count_test = len(list(dataset_root_path.glob("test/*/ *.avi")))
video_total = video_count_train + video_count_val + video_count_test
print(f"总视频数: {video_total}")
all_video_file_paths = (
    list(dataset_root_path.glob("train/*/ *.avi"))
    + list(dataset_root_path.glob("val/*/ *.avi"))
    + list(dataset_root_path.glob("test/*/ *.avi"))
)
all_video_file_paths[:5]
(排序后的)视频路径如下所示:
你会注意到,有些视频片段属于同一个组/场景,组由视频文件路径中的 g 表示。例如,v_ApplyEyeMakeup_g07_c04.avi 和 v_ApplyEyeMakeup_g07_c06.avi 属于同一组。
对于验证和评估拆分,你不希望有来自同一组/场景的视频片段,以防止数据泄露。本教程中使用的子集考虑了这一点。
接下来,你将从数据集中提取标签集。同时,创建两个字典,有助于初始化模型:
label2id:将类别名称映射到整数。id2label:将整数映射到类别名称。
class_labels = sorted({str(path).split("/")[2] for path in all_video_file_paths})
label2id = {label: i for i, label in enumerate(class_labels)}
id2label = {i: label for label, i in label2id.items()}

print(f"唯一类别: {list(label2id.keys())}.")
# 唯一类别: ['ApplyEyeMakeup', 'ApplyLipstick', 'Archery', 'BabyCrawling', 'BalanceBeam', 'BandMarching', 'BaseballPitch', 'Basketball', 'BasketballDunk', 'BenchPress'].
共有 10 个唯一类别。每个类别在训练集中有 30 个视频。
加载模型进行微调
从预训练检查点实例化视频分类模型及其关联的图像处理器。模型的编码器带有预训练参数,而分类头则是随机初始化的。图像处理器将在编写数据集的预处理管道时派上用场。
from transformers import VideoMAEImageProcessor, VideoMAEForVideoClassification

model_ckpt = "MCG-NJU/videomae-base"
image_processor = VideoMAEImageProcessor.from_pretrained(model_ckpt)
model = VideoMAEForVideoClassification.from_pretrained(
    model_ckpt,
    label2id=label2id,
    id2label=id2label,
    ignore_mismatched_sizes=True,  # 如果你计划微调一个已经微调过的检查点,提供此参数
)
在加载模型时,你可能会注意到以下警告:
警告告诉我们,我们在丢弃一些权重(例如 classifier 层的权重和偏置),并随机初始化一些其他权重(新的 classifier 层的权重和偏置)。这是预期的行为,因为我们在添加一个新的头部,而没有预训练的权重,因此库提醒我们需要在使用模型进行推理之前对其进行微调,而这正是我们将要做的。
注意:此检查点在类似下游任务上进行了微调,具有相当大的领域重叠,因此在本任务上的表现更好。你可以查看 此检查点,它是通过对 MCG-NJU/videomae-base-finetuned-kinetics 进行微调获得的。
准备数据集进行训练
为了预处理视频,你将利用 PyTorchVideo 库。首先导入所需的依赖项。
import pytorchvideo.data

from pytorchvideo.transforms import (
    ApplyTransformToKey,
    Normalize,
    RandomShortSideScale,
    RemoveKey,
    ShortSideScale,
    UniformTemporalSubsample,
)

from torchvision.transforms import (
    Compose,
    Lambda,
    RandomCrop,
    RandomHorizontalFlip,
    Resize,
)
对于训练数据集的变换,使用均匀时间采样、像素归一化、随机裁剪和随机水平翻转的组合。对于验证和评估数据集的变换,使用相同的变换链,但不包括随机裁剪和水平翻转。有关这些变换的详细信息,请参阅 PyTorchVideo 官方文档。
使用与预训练模型关联的 image_processor 获取以下信息:
- 用于归一化视频帧像素的图像均值和标准差。
- 视频帧将调整大小的空间分辨率。
首先定义一些常量。
mean = image_processor.image_mean
std = image_processor.image_std
if "shortest_edge" in image_processor.size:
    height = width = image_processor.size["shortest_edge"]
else:
    height = image_processor.size["height"]
    width = image_processor.size["width"]
resize_to = (height, width)

num_frames_to_sample = model.config.num_frames
sample_rate = 4
fps = 30
clip_duration = num_frames_to_sample * sample_rate / fps
现在,分别定义数据集特定的变换和数据集。从训练集开始:
train_transform = Compose([
    ApplyTransformToKey(
        key="video",
        transform=Compose([
            UniformTemporalSubsample(num_frames_to_sample),
            Lambda(lambda x: x / 255.0),
            Normalize(mean, std),
            RandomShortSideScale(min_size=256, max_size=320),
            RandomCrop(resize_to),
            RandomHorizontalFlip(p=0.5),
        ]),
    ),
])

train_dataset = pytorchvideo.data.Ucf101(
    data_path=os.path.join(dataset_root_path, "train"),
    clip_sampler=pytorchvideo.data.make_clip_sampler("random", clip_duration),
    decode_audio=False,
    transform=train_transform,
)
同样的工作流程可以应用于验证和评估集:
val_transform = Compose([
    ApplyTransformToKey(
        key="video",
        transform=Compose([
            UniformTemporalSubsample(num_frames_to_sample),
            Lambda(lambda x: x / 255.0),
            Normalize(mean, std),
            Resize(resize_to),
        ]),
    ),
])

val_dataset = pytorchvideo.data.Ucf101(
    data_path=os.path.join(dataset_root_path, "val"),
    clip_sampler=pytorchvideo.data.make_clip_sampler("uniform", clip_duration),
    decode_audio=False,
    transform=val_transform,
)

test_dataset = pytorchvideo.data.Ucf101(
    data_path=os.path.join(dataset_root_path, "test"),
    clip_sampler=pytorchvideo.data.make_clip_sampler("uniform", clip_duration),
    decode_audio=False,
    transform=val_transform,
)
注意:上述数据集管道取自 PyTorchVideo 官方示例。我们使用的是 [pytorchvideo.data.Ucf101()](https://pytorchvideo.readthedocs.io/en/latest/api/data/data.html#pytorchvideo.data.Ucf101) 函数,因为它专为 UCF-101 数据集定制。在底层,它返回一个 [pytorchvideo.data.labeled_video_dataset.LabeledVideoDataset](https://pytorchvideo.readthedocs.io/en/latest/api/data/data.html#pytorchvideo.data.LabeledVideoDataset) 对象。LabeledVideoDataset 类是 PyTorchVideo 数据集中所有视频的基础类。因此,如果你想使用不支持的自定义数据集,可以扩展 LabeledVideoDataset 类。更多详情请参考 data API 文档。如果你的数据集结构与此类似(如上所示),那么使用 pytorchvideo.data.Ucf101() 应该没问题。
你可以通过访问 num_videos 参数来了解数据集中的视频数量。
print(train_dataset.num_videos, val_dataset.num_videos, test_dataset.num_videos)
# (300, 30, 75)
可视化预处理后的视频以便更好地调试
import imageio
import numpy as np
from IPython.display import Image
def unnormalize_img(img):
"""反归一化图像像素。"""
img = (img * std) + mean
img = (img * 255).astype("uint8")
return img.clip(0, 255)
def create_gif(video_tensor, filename="sample.gif"):
"""从视频张量中生成 GIF。
期望视频张量的形状为:
(num_frames, num_channels, height, width)。
"""
frames = []
for video_frame in video_tensor:
frame_unnormalized = unnormalize_img(video_frame.permute(1, 2, 0).numpy())
frames.append(frame_unnormalized)
kargs = {"duration": 0.25}
imageio.mimsave(filename, frames, "GIF", **kargs)
return filename
def display_gif(video_tensor, gif_name="sample.gif"):
"""从视频张量中生成并显示 GIF。"""
video_tensor = video_tensor.permute(1, 0, 2, 3)
gif_filename = create_gif(video_tensor, gif_name)
return Image(filename=gif_filename)
sample_video = next(iter(train_dataset))
video_tensor = sample_video["video"]
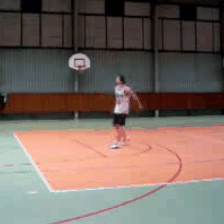
display_gif(video_tensor)
训练模型
使用 🤗 Transformers 的 Trainer 来训练模型。要实例化 Trainer,你需要定义训练配置和评估指标。最重要的是 TrainingArguments,这是一个包含所有属性以配置训练的类。它需要一个输出文件夹名称,该名称将用于保存模型的检查点。它还有助于在 🤗 Hub 上同步模型仓库中的所有信息。
大多数训练参数都是自解释的,但其中一个相当重要的是 remove_unused_columns=False。这个参数会删除模型调用函数未使用的所有特征。默认情况下,它为 True,因为在大多数情况下,删除未使用的特征列是理想的,使其更容易将输入解包到模型的调用函数中。但在这种情况下,你需要未使用的特征(特别是 video)来创建 pixel_values(这是模型输入中必需的键)。
from transformers import TrainingArguments, Trainer

model_name = model_ckpt.split("/")[-1]
new_model_name = f"{model_name}-finetuned-ucf101-subset"
num_epochs = 4

args = TrainingArguments(
    new_model_name,
    remove_unused_columns=False,
    eval_strategy="epoch",
    save_strategy="epoch",
    learning_rate=5e-5,
    per_device_train_batch_size=batch_size,
    per_device_eval_batch_size=batch_size,
    warmup_ratio=0.1,
    logging_steps=10,
    load_best_model_at_end=True,
    metric_for_best_model="accuracy",
    push_to_hub=True,
    max_steps=(train_dataset.num_videos // batch_size) * num_epochs,
)
pytorchvideo.data.Ucf101() 返回的数据集没有实现 __len__ 方法。因此,我们在实例化 TrainingArguments 时必须定义 max_steps。
接下来,你需要定义一个函数来计算预测的指标,这将使用你现在加载的 metric。唯一的预处理是你需要对预测的 logits 进行 argmax:
import evaluate

metric = evaluate.load("accuracy")

def compute_metrics(eval_pred):
    predictions = np.argmax(eval_pred.predictions, axis=1)
    return metric.compute(predictions=predictions, references=eval_pred.label_ids)
关于评估的说明:
在 VideoMAE 论文中,作者使用了以下评估策略。他们在测试视频的多个片段上评估模型,并对这些片段应用不同的裁剪,报告聚合分数。然而,为了简单和简洁,本教程中不考虑这一点。
你还需定义一个 collate_fn,用于将样本批处理在一起。每个批次包含两个键,即 pixel_values 和 labels。
def collate_fn(examples):
    # 调整为 (num_frames, num_channels, height, width)
    pixel_values = torch.stack(
        [example["video"].permute(1, 0, 2, 3) for example in examples]
    )
    labels = torch.tensor([example["label"] for example in examples])
    return {"pixel_values": pixel_values, "labels": labels}
然后,你只需将所有这些内容以及数据集传递给 Trainer:
trainer = Trainer(
    model,
    args,
    train_dataset=train_dataset,
    eval_dataset=val_dataset,
    processing_class=image_processor,
    compute_metrics=compute_metrics,
    data_collator=collate_fn,
)
你可能会想知道为什么在预处理数据时已经传入了 image_processor。这只是为了确保图像处理器的配置文件(存储为 JSON)也会上传到 Hub 仓库中。
现在通过调用 train 方法微调模型:
train_results = trainer.train()
训练完成后,使用 push_to_hub() 方法将模型分享到 Hub,这样每个人都可以使用你的模型:
trainer.push_to_hub()
sample_test_video = next(iter(test_dataset))

最简单的方法是使用模型进行推理,就是将其放在一个 pipeline 中。实例化一个用于视频分类的 pipeline 并传递你的视频:
from transformers import pipeline

video_cls = pipeline(model="my_awesome_video_cls_model")
video_cls("https://huggingface.co/datasets/sayakpaul/ucf101-subset/resolve/main/v_BasketballDunk_g14_c06.avi")
你也可以手动复制 pipeline 的结果,如果你愿意的话:
def run_inference(model, video):
    # (num_frames, num_channels, height, width)
    perumuted_sample_test_video = video.permute(1, 0, 2, 3)
    inputs = {
        "pixel_values": perumuted_sample_test_video.unsqueeze(0),
        "labels": torch.tensor(
            [sample_test_video["label"]]
        ),  # 如果没有标签,可以跳过
    }

    device = torch.device("cuda" if torch.cuda.is_available() else "cpu")
    inputs = {k: v.to(device) for k, v in inputs.items()}
    model = model.to(device)

    # 前向传播
    with torch.no_grad():
        outputs = model(**inputs)
        logits = outputs.logits

    return logits

logits = run_inference(trained_model, sample_test_video["video"])
解码 logits,我们得到:
predicted_class_idx = logits.argmax(-1).item()
print("预测类别:", model.config.id2label[predicted_class_idx])
# 预测类别: BasketballDunk